Are you ready to give your home a fresh look?
Before grabbing that paintbrush, it’s important to know the ropes.
Painting your house exterior involves knowing how to paint different house exterior type such as weatherboard, understanding the cost of painting, choosing the exterior paint colour, and comparing between DIY vs hiring a professional painter.
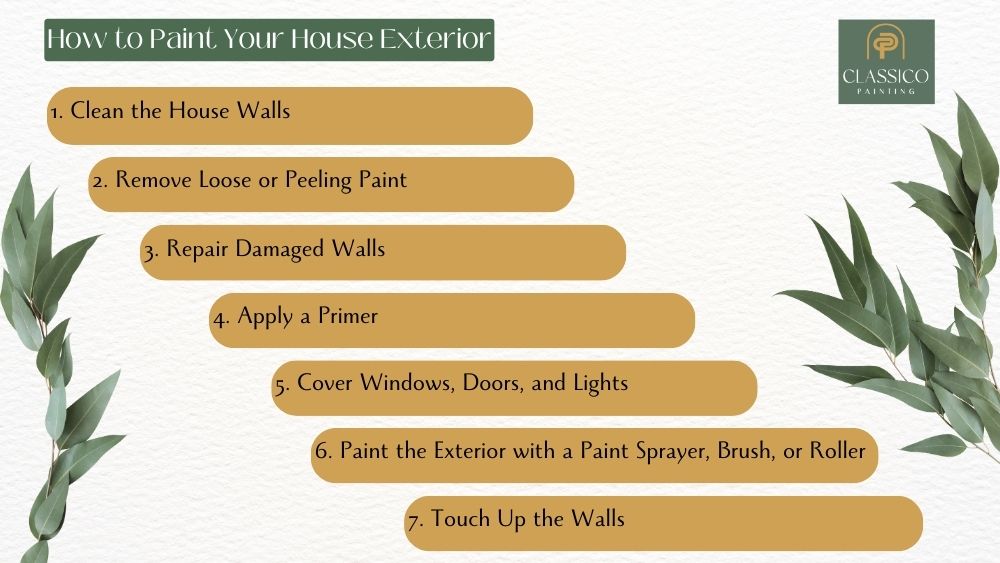
First, let’s start with how to paint your house exterior with these 7 steps.

1. Clean the House Walls
Before you even think about dipping that brush in paint, you’ve got to make sure your house walls are spotless. Cleaning the exterior of your house is an essential step, and it’s not just a quick hose down. No, this job needs more elbow grease!
You’ll want to use a power washer or a stiff-bristled brush with soapy water to remove stubborn dirt and grime. Pay attention to areas around windows and doors where dust may have collected.
Remember, cleaner walls mean the paint will adhere better and last longer. So don’t cut corners here; you might regret it later when your newly painted exterior starts peeling prematurely!
Now that we’ve covered cleaning let’s tackle loose or peeling paint.
2. Remove Loose or Peeling Paint
You’ll need to scrape off flaking or peeling areas to ensure a smooth surface. Grab a paint scraper and remove loose or peeling paint from your exterior house walls. Be thorough but gentle; you don’t want to damage the underlying wood or cladding.
Next, sand down the scraped areas with medium-grit sandpaper. This further smooths out the surface and helps new paint adhere better. Remember, thorough preparation is key for a successful painting job.
3. Repair Damaged Walls
Next up, it’s time to mend any damaged walls. It isn’t just vital for aesthetics; it’s also essential to protect your house from the elements.
Start by examining your exterior walls closely. Look out for cracks, holes, or other types of damage that may need attention.
If you spot small holes or cracks in wooden areas, a good quality wood filler will be your best friend. Make sure it’s suitable for exterior use and follow the instructions on the product label closely. Don’t forget to let it dry completely before proceeding.
More significant damages might require professional help, but don’t worry; you’re already making significant progress in preparing your home for a fresh coat of paint.
Now that you’ve successfully repaired damaged walls let’s move on to our next step: applying primer!
4. Apply a Primer
Applying a primer is essential, as it will ensure the longevity and vibrancy of the colour you’ve chosen for your house exterior. If you want your exterior paint to last, it’s not something to skip.
Here’s how you apply primer effectively.
First, make sure that the surface is clean and dry. Then, use a brush or roller to apply the primer on your wall evenly. Don’t rush this process; careful strokes will give better coverage and adherence, setting up a good base for your exterior paint.
Remember: Primer doesn’t just help with colour; it also provides an extra layer of protection against weather elements. By taking time to apply primer properly, you’re investing in the long-term beauty and durability of your home’s facade.
5. Cover Windows, Doors, and Lights
Before moving on to the painting, you must cover windows, doors, and lights to prevent accidental spills or splatters.
Starting with your front door, apply masking tape along its edges. Ensure it’s secure; you don’t want paint seeping through your door.
Next, tackle the windows. Cover the glass thoroughly with newspaper or plastic sheets; again, use masking tape to keep them in place.
Don’t forget about light fittings! Wrap them up as best as you can for complete protection.
This step might seem tedious, but it’s a practical move to save you from future cleaning hassles or damage repairs.
Remember: proper preparation is vital for an efficient job well done!
6. Paint the Exterior with a Paint Sprayer, Brush, or Roller
Once you’ve got everything covered, it’s time to apply colour with a sprayer, brush or roller.
Choose a paint sprayer, brush or roller for this job, depending on your preference and the specifics of your home exterior.
Sprayers are quick but require more preparation and clean-up; brushes offer control but can be slow; rollers bridge these two worlds.
For efficiency, use a paint sprayer for large areas. You’ll cover ground quickly with this tool.
For detail, work around doors and windows and switch to a brush. It takes longer but provides precision.
Lastly, a roller works well on surfaces like roughcast that aren’t ideal for spraying.
7. Touch Up the Walls
You’ll need to touch up the walls after the initial application to ensure a smooth, even finish. Please don’t rush this process; it’s crucial for achieving professional-looking results when you paint your house exterior.
The touch-up phase allows you to cover missed spots and eliminate brush marks or drips. Use a small brush with fresh paint, apply it sparingly and blend it into the dry areas. Remember, less is more during this step.
Also, remember that different weather conditions might affect how the paint dries on your house exterior; warmer temperatures can cause the paint to dry too quickly and create an uneven appearance. Make sure you’re working with ideal conditions for best results.
Next, let’s discuss removing the cover for windows, doors, and lights!
8. Remove the Cover for Windows, Doors, and Lights
After all the painting’s done, it’s time to carefully remove the coverings from your windows, doors, and lights. It’s a crucial step when you paint your house exterior to ensure no residual paint mars the surfaces. Don’t rush this process; be patient and gentle while removing the tape or covers to avoid damage.
Ensure that the paint is completely dry before removing the cover for windows. If there’s still wet paint on your walls, wait for it to dry completely. If not, you might smudge it onto your uncovered areas, leading to unnecessary clean-ups later.
Lastly, look for any missed spots or drips of paint on window panes or doorknobs and wipe them away promptly with a damp cloth.
Exterior Painting Tips and Ideas
When renovating the outside of your home, it’s essential to consider some fundamental suggestions and creative ideas.
Start with proper preparation; it’s not just about picking up a brush and paint. Invest in a good pressure washer to remove dirt, mould, or loose paint for optimal results.
Now comes the enjoyable part: selecting exterior paint colours. Choose colours that complement your surroundings or make a bold statement if that’s your style. Don’t forget to consider how different natural light conditions might affect the final look.
Ensure you have the correct tools and safety equipment before you begin painting.
As we move on to our next section, we will discuss specific tips on how to paint the exterior of a weatherboard house efficiently and effectively.
How to Paint Weatherboard House Exterior
We’ll reveal how to paint the weatherboard house exterior efficiently and effectively, considering the unique challenges this type of surface presents.
Firstly, your weatherboard house exterior requires thorough preparation. Utilise a high-pressure water blaster to remove any dirt or loose paint. Once dry, repair any damages by filling in gaps and cracks with exterior-grade filler.
Next comes priming; this is crucial for ensuring good adhesion of your exterior paint. Remember, a primer designed for timber surfaces is the ideal choice here.
Then, it’s time for the paint job itself! Opt for an acrylic paint formulated explicitly for weatherboards – it will adhere better and withstand the elements longer.
Keep two things in mind: firstly, use long strokes parallel to the boards; secondly, start at the top and work downwards to avoid streaks.
Maintain patience throughout these stages – quality takes time. Finally, do the touch up to ensure a smooth result.
How Much Does It Cost to Paint the Exterior of a House?
Having grasped how to paint your weatherboard house exterior, you’re now prepared to tackle a new challenge – calculating how much does exterior house painting cost.
It’s not as daunting as it may seem at first glance. The cost can vary greatly depending on factors such as the size of your house, the type and quality of paint used, and whether you’ll be doing it yourself or hiring professionals.
On average, for a typical two-storey house, expect to spend anywhere from $3,000 to over $7,000, if you hire a professional painter. If you’re painting yourself, costs can be significantly lower, but remember that time is also an investment.
Be practical in your budgeting and ensure every dollar spent yields value in enhancing the appeal of your home.
DIY Painting vs. Professional Painting
When painting your home, you have two options: DIY vs hiring a professional painter. Both approaches have advantages and disadvantages, so it’s essential to consider your needs and capabilities before deciding.
DIY painting can be cost-effective, as you won’t have to pay for labour. It can also be a rewarding experience, allowing you to put your personal touch on your living space. Additionally, you can work at your own pace and choose the colours and finishes you prefer.
However, DIY painting does have its drawbacks. It requires significant time and effort, especially if you’re inexperienced or tackling a large project.
When considering a DIY project, assessing your skills and patience is essential. With DIY painting, you’re in control when you paint your house exterior yourself, saving money and relishing in the satisfaction of a job well done. However, this comes with a time commitment and potential inconsistencies.
On the other hand, hiring professionals can ensure quality results within a timeline but at a cost. They’ve got experience on their side for tricky spots or material nuances.
How to Choose Exterior Paint Colours?
Choosing the right colours for your home’s exterior isn’t just about aesthetics; it’s also about creating a harmonious balance with the environment. You’ll want to consider how to choose exterior house paint colour that will look different in lighting conditions and against your landscaping.
The right paint can make or break your home’s kerb appeal. Consider testing out several colours before making a final decision. It’s not uncommon for homeowners to buy small tins of paint and apply swatches to their exterior walls. This way, you see exactly how each colour looks on your house instead of relying on a tiny paint chip.
Don’t feel pressured to use the same colour everywhere; variation adds interest! Just ensure any colours chosen work well together and complement your surroundings.


